Single Sign-On (SSO) is an authentication method that allows users to access multiple applications using a single set of login credentials. Rather than logging in to each application separately, users can authenticate once and are then automatically granted access to the other applications within the SSO system.
Content
In this guide, we will cover the proceeding topics:
Configuring 360iQ Organization Wizard
Note: To access the Organization Wizard in 360iQ, you must have an SSO Admin role in 360iQ. To update your permissions, please contact Support or your Customer Experience Manager.
Once you have added 360iQ to Microsoft Entra ID, proceed as follows:
- Log in to 360iQ.
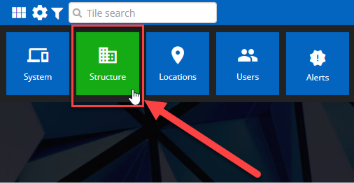
- Click the Settings (gear) icon in the top left corner of the page.

- Click the Structure tile.
- Click the Organizations tab.

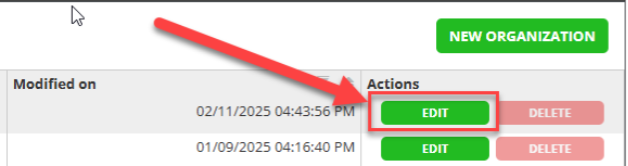
- In the Organizations wizard, find your organization and click the EDIT button in the Actions column. If there are multiple organizations, choose the one that matches your company name.
- Click Next to advance the menu to the Security section.
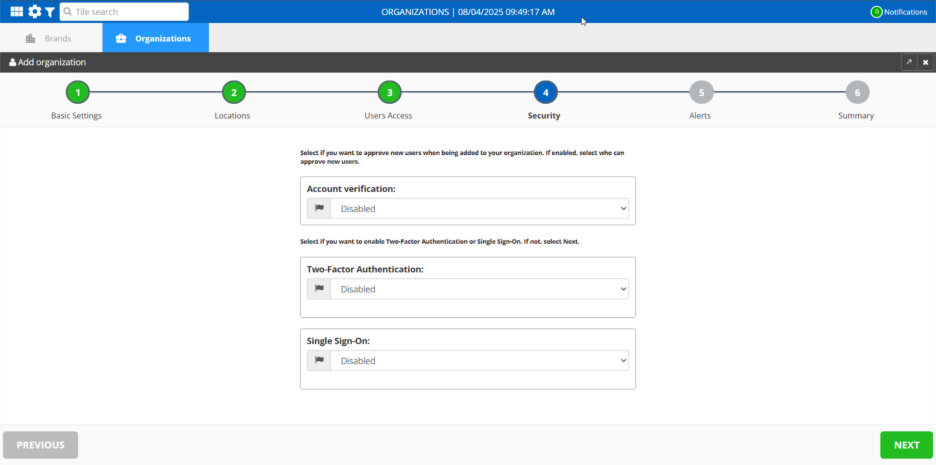
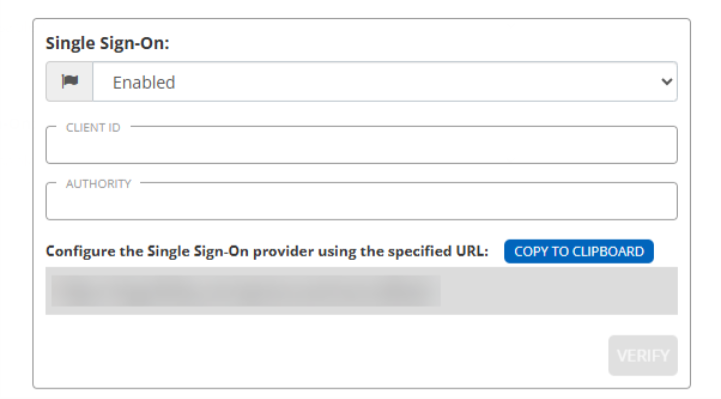
- Under Single Sign-On, click the dropdown arrow and choose Enabled.
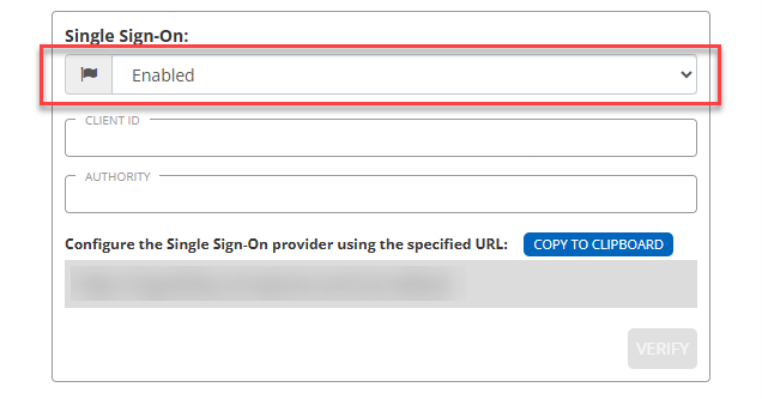
- More options will appear. Enter the Client ID and Authority.

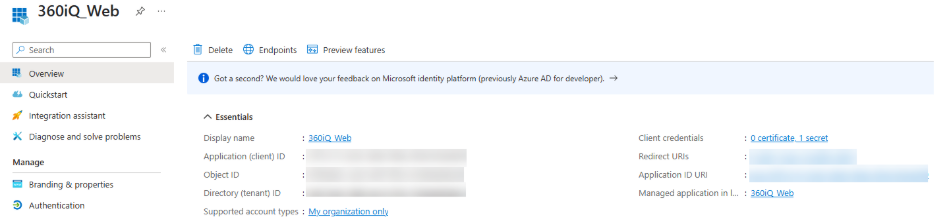
- Return to Microsoft Entra ID. Copy the Application (client ID) from Entra and paste it into 360iQ.
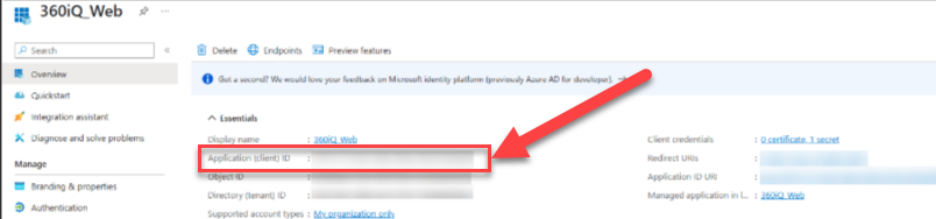
- Go back to Microsoft Entra ID. Find and copy the Directory (tenant) ID.

- Return to 360iQ. In the Authority field, type “https://login.microsoftonline.com/{Directory}/v2.0”, where “{Directory}” is the value from the Entra page (Directory (tenant) ID).
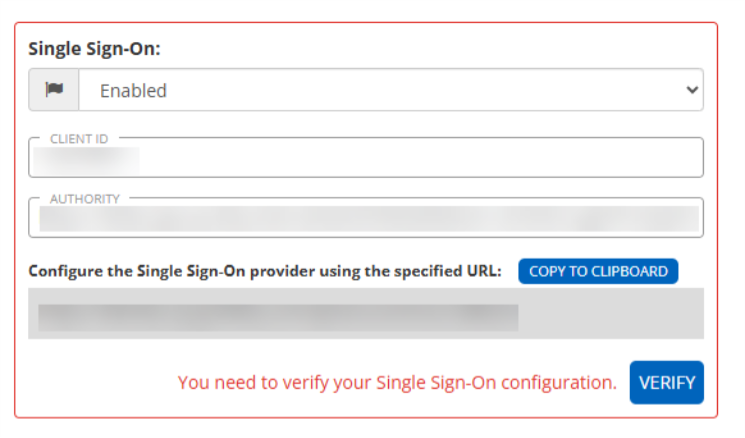
- Once you have provided these details, you must confirm them via a verification flow. To begin verification, click the Verify button. You will be redirected to your SSO provider’s login page, where you need to perform a successful login.

If your login is successful, you will receive this message and can move on to the next steps:

If the verification is unsuccessful, you cannot proceed and will receive this error message:
- Once verification has been completed, click Next.

- On the Summary page, review your details, then click Save.
Note: Once Single Sign-On (SSO) has been configured properly, all users will be required to use SSO upon their next log in.
Configuring Microsoft Entra ID
- Sign in to Microsoft Entra.
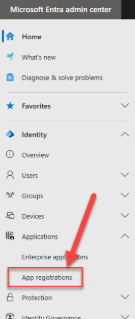
- Open the Microsoft Entra admin center, and navigate to the Applications tab.
- Click the dropdown arrow to expand the tab, then click App registrations.
- At the top of the page, click the + New registration button to create a new registration option for 360iQ.

- After creating the registration, click the Overview tab to configure the SSO settings.
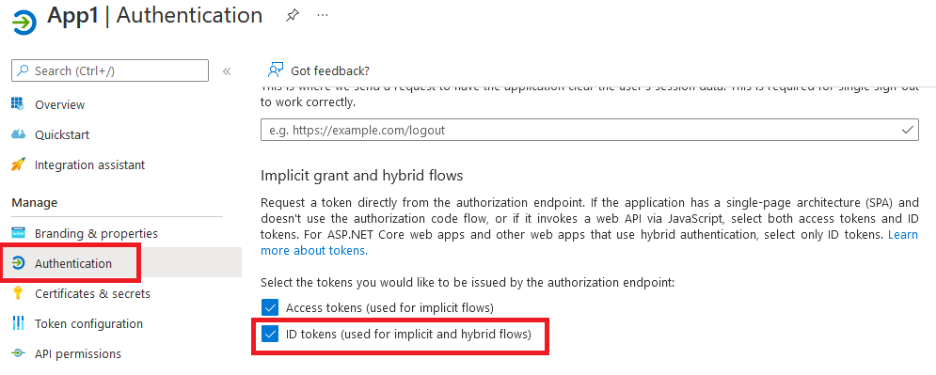
- Next, navigate to the Authentication tab.
- Scroll down to the Implicit grant and hybrid flows section. You will need to enable the ID_Token issuance for the application.
- Select the checkbox beside ID tokens (used for implicit and hybrid flows).
For additional information or questions, please contact Support at support@dtiq.com or your Customer Experience Team at csr@dtiq.com.