To create a new user in the 360iQ platform, navigate to https://app.go360iq.com/. When prompted, enter your username/email and password, then click the green SIGN IN button.
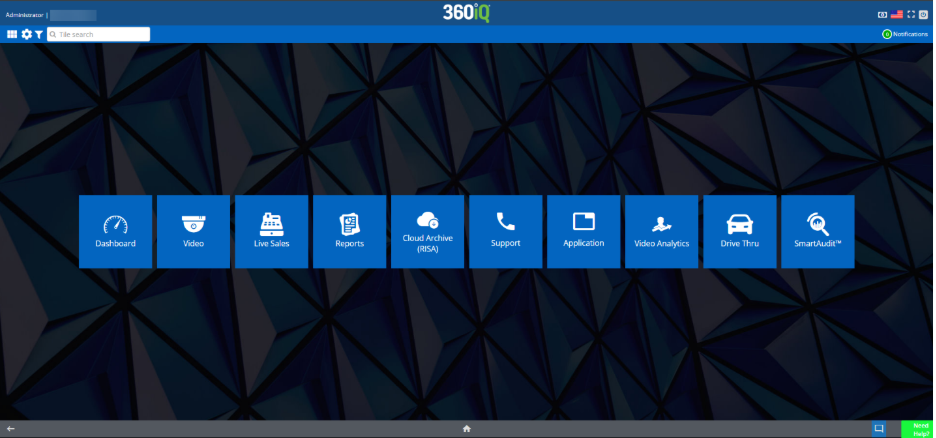
For most users, once you log into 360iQ, you’ll be taken to the Home screen. You should see the tiles below. You can also return Home by clicking the Home icon at bottom of any screen.

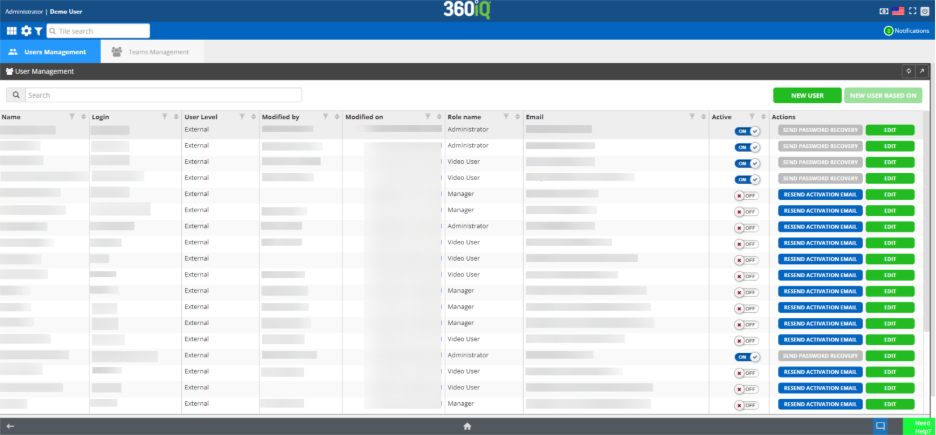
On the Home screen, click the gear icon in the top left corner of the screen to access Settings, then click the Users tile.

Clicking the Users tile takes you to the Users dashboard. Here, you can view a list of all users in the system, including their Name, Login, User Level, Modified By, Modified On, Role name, Email, Active status, and available Actions.
Create a New User
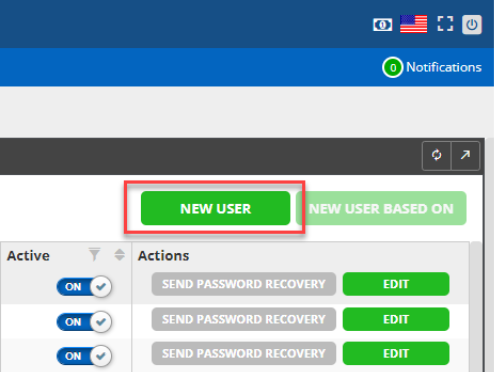
To add a new user, click the green NEW USER button at the top right of the dashboard. You will be redirected to the User Creation Wizard.
The User Creation Wizard consists of three sections:
- Details & Sign in credentials
- Locations
- Summary
In this guide, we’ll walk through filling out each section and completing the user creation process.
1. Details & Sign in credentials
In the User Details section, fill out the following information:
- First name
- Last name
- Note: Your First name and Last name cannot contain numbers.
- User Level (Internal or External)
- Note: External 360iQ customers will only see the External option.
- Initial Screen (Home or Dashboard)
- Role
- Email
- Note: You cannot use the same email address across multiple profiles.
- Country
- Language
- Currency
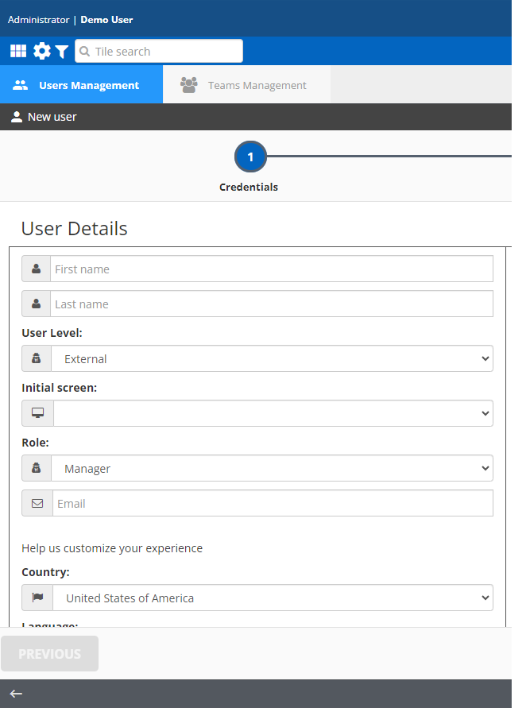
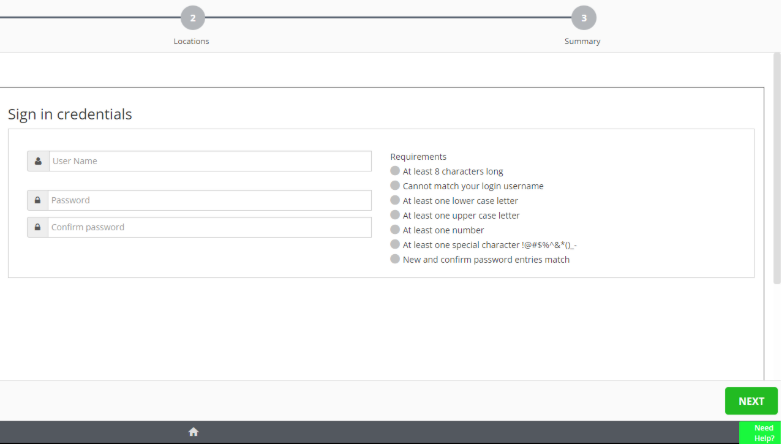
To the right of the User Details are the Sign in credentials, or the information your new user will need to access the platform. Enter the desired User Name and Password, then Confirm password. Once you’ve satisfied the password creation requirements, hit Next to continue the process.
2. Locations
In the next step of the user creation process, you’ll choose which Organizations and Locations the user can access. A list of organizations will display. Choose your location from the available options or search for your desire location. You can also click SELECT ALL to select multiple organizations.
Once you’ve selected your organization, choose which Locations will be accessible to the new user. Again, you can click SELECT ALL here to select all the locations shown.
Note: To select the locations, click the arrow to the right of the location name. The selected locations will show up under Selected locations / organizations. If you want to grant a user access to the whole organization, click the arrow on the organization name.
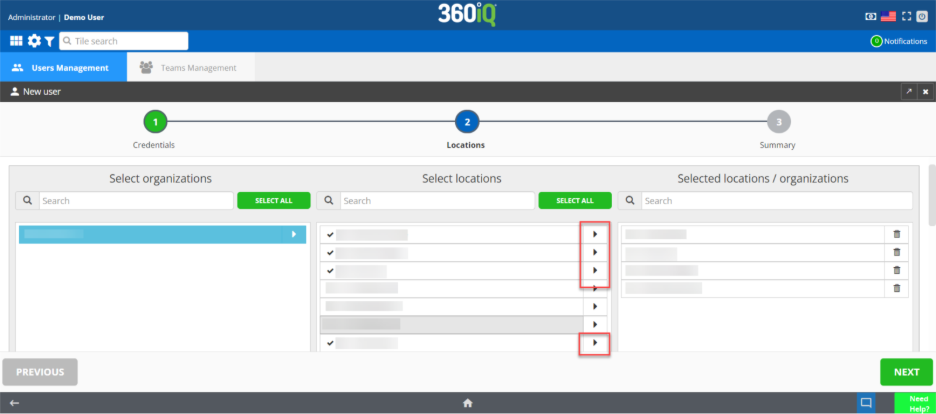
After you’ve made your selections, you can review them in the right-most Selected locations / organizations. Once everything looks good, hit NEXT to continue.
3. Summary
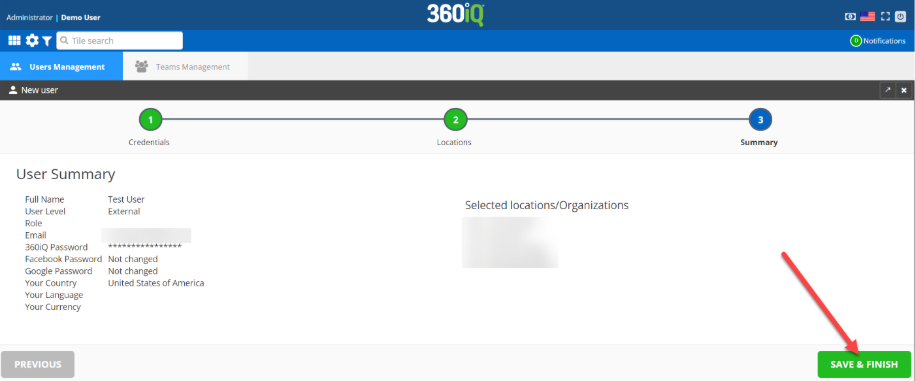
In the last step of the process for creating a new user, you’ll review the information you entered for the user. Make sure everything is correct, then click the SAVE & FINISH button in the bottom right corner of the page. You’re all set!
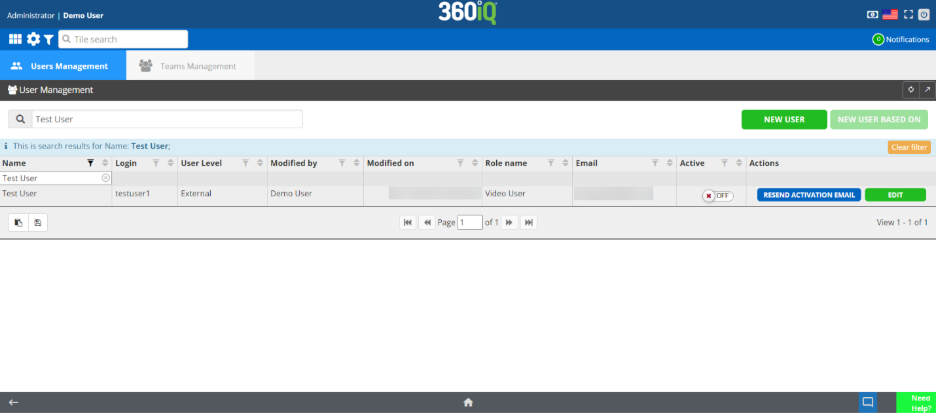
Once your new user has been created, you’ll be taken back to the User Management dashboard. You can now search for the user you created to ensure they’re in the system.
Create a New User Based On
If you have already created a new user within your organization, you can create a new user based on any existing user.
On the User Management dashboard, select the name of the existing user on which you would like to base the new user. Click the NEW USER BASED ON button in the top left corner of the screen.

Once the new window opens, follow the same steps as if you were creating a new user.
For additional information or questions please contact DTiQ Support at support@dtiq.com or your Customer Success Manager at csr@dtiq.com.