Note: DTiQ’s Live Sales panel requires an active POS subscription and is POS dependent. Some POS systems may not provide live, real-time data, which prevents Live Sales from functioning as intended.
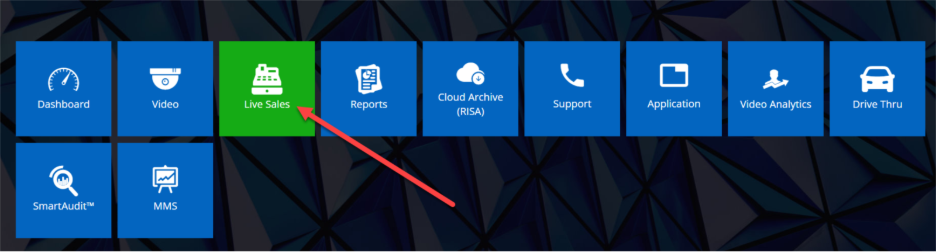
To view the Live Sales panel, click on the Live Sales tile in the top menu bar. The Live Sales panel gives you an overview of your entire organization. It allows you to compare sales data from individual locations and act on any suspicious transactions.
Content
In this guide, you will learn the following:
- How to Navigate the Live Sales Dashboard
- Transaction Review
- Show Register Actions
- Neighboring Transactions (+/- 5 Trans., +/- ALL)
How to Navigate the Live Sales Dashboard
To choose between Net and Gross transaction values, click on the Net or Gross buttons in the upper right-hand corner.
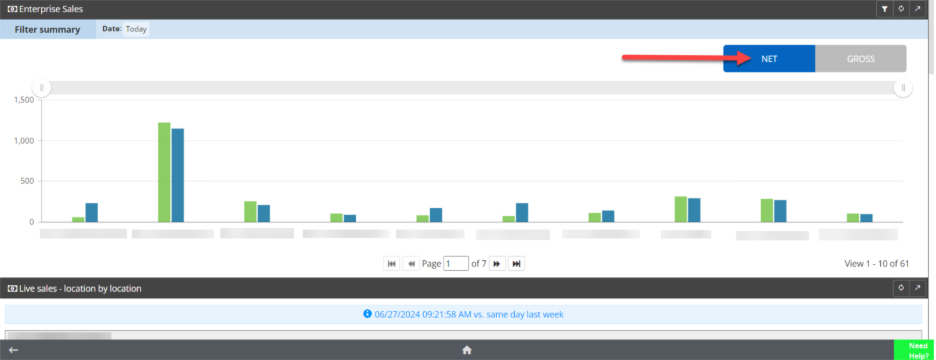
Scroll down to view Live sales – location by location. The top number represents the current day, while the bottom number represents the same day and time for the previous week.
The main values measured and displayed as widgets include the following:
- Sales
- Average TRX (transaction) Value
- Check count
- LP (Loss Prevention) Events
- Alerts
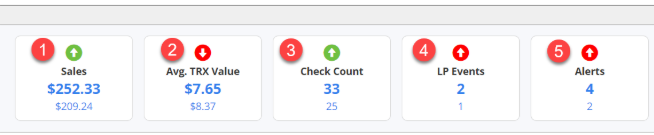
A green arrow indicates an improvement compared to the previous week, and a red arrow indicates worsening performance compared to the previous week. Click on a widget to see transactions associated with the selected metric.
Transaction Review
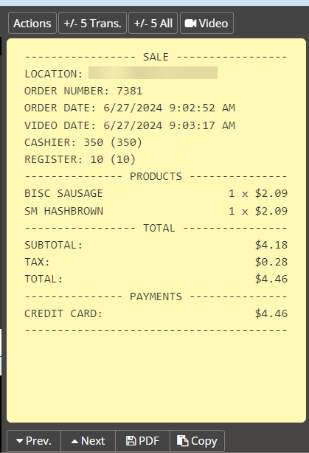
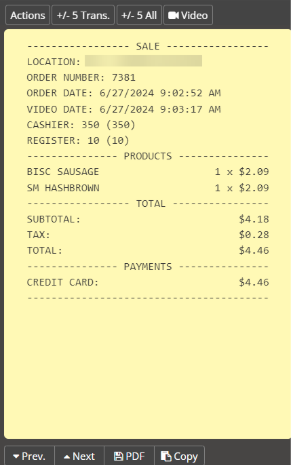
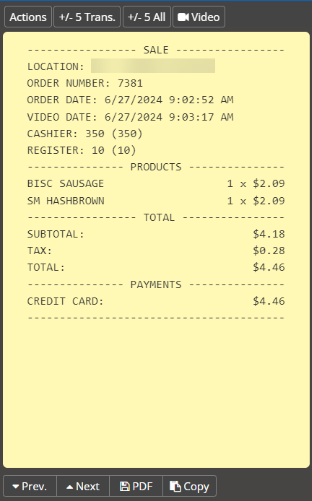
Clicking on a Sales widget in the Live Sales panel will bring you to the Transaction Details panel, where you can review the details of a sales transaction using the digital receipt and the associated video.
Note: To move between transactions in the Live Sales Report, use your keyboard’s arrow keys.

Double-clicking on a transaction in the Transactions list will open a drop-down menu. Within this menu, you can conduct the following actions:
- Click Play to view video of the transaction.
- Click Video Recording to create a video snippet.
- Click Notify to inform another user about the transaction.
- Click Archive to request a downloadable video file.
The digital receipt view on the right side of the screen offers several options for users, including Actions, Show Receipt, +/- 5 Trans., +/- 5 All, Video, Prev., Next, PDF, and Copy.
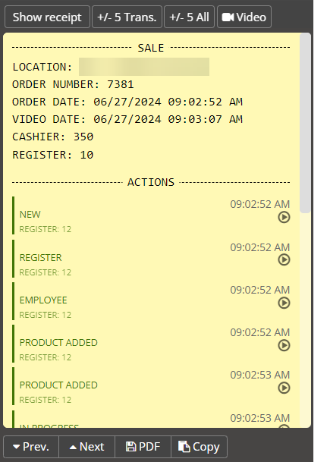
Show Register Actions
Note: The Register Actions feature is only available for certain POS integrations.
Click the Actions button, located in the upper left-hand corner of the digital receipt, to see a transaction breakdown by action performed at the point-of-sale register. This feature can save you time when reviewing video of a transaction by allowing you to go directly to the moment of payment.
Click the Show receipt button to go back to the digital receipt.
Neighboring Transactions (+/- 5 Trans, +/- 5 ALL)
When reviewing transactions, you can easily find what happened before and after the transaction by clicking the +/- 5 Trans. button located on the upper right-hand side of the digital receipt (next to the Actions/Show receipt button). Once selected, you will see 5 transactions that occurred before the selected transaction and up to 5 transactions that occurred after the selected transaction on that register.
The +/- 5 All button helps to review transactions from all registers. Once selected, you will see 5 transactions that occurred before the selected transaction and up to 5 transactions that occurred after the chosen transaction from all registers.
Click the BACK TO REPORT button in the upper right-hand corner of the Transactions List table to return to the Transactions Details screen, or the left arrow button in the lower left-hand corner below the Transactions List table to return to the Live Sales panel.
For additional information or questions, please contact DTiQ Support at support@dtiq.com or your Customer Experience Team at csr@dtiq.com.