360iQ’s Motion Search feature allows you to track movement in your business locations.
Content
In this guide, we will cover the proceeding topics:
Live Motion Detection
Live Motion detection provides a convenient way to find instances of movement in certain camera views. 360iQ live motion detection is available for any camera type and can be configured for up to 4 cameras per Network Video Recorder (NVR). To add live motion detection or change the cameras that live motion detection is being performed on, contact our Support team.

Motion Search
To search for motion in video footage, visit the 360iQ Home Screen, click the Video tile and select the location in which you would like to search for motion.
Once in the video panel, click the Motion icon located in the bottom right-hand corner of your screen.
On the screen, you will see a side panel, with three options:
Live Motion Search : Use this option to see motion detection results for cameras configured for Live Motion Search (available only if at least one camera is configured for Live Motion Search).
My requests | All requests : Use this option to make new motion detection requests and see the results of previous motion detection requests corresponding to video that is still stored on the NVR.
Live Motion Search 
Note: To use Live Motion Search, you must pre-enable the feature for up to 4 cameras.
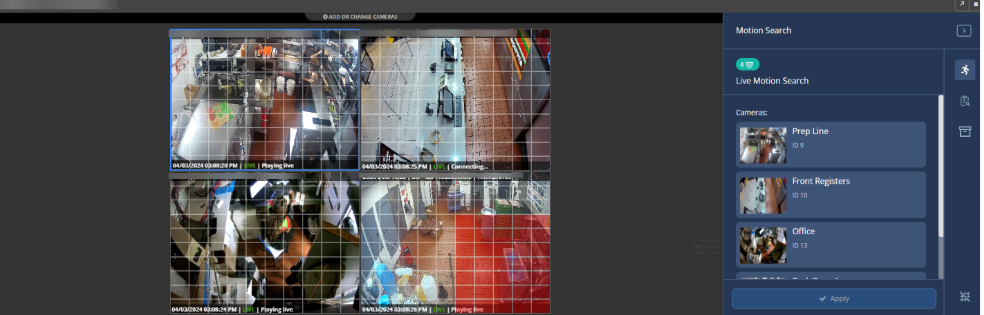
After clicking the Live Motion Search icon in the far-right part of the Motion Search side panel, you will see a grid overlay for each camera configured for live motion detection (limited to 4 cameras per NVR).
Using the cursor, choose the area(s) on the grid in which you would like to see motion detection events. Then, click the Apply button on the bottom of the Motion Search side panel.
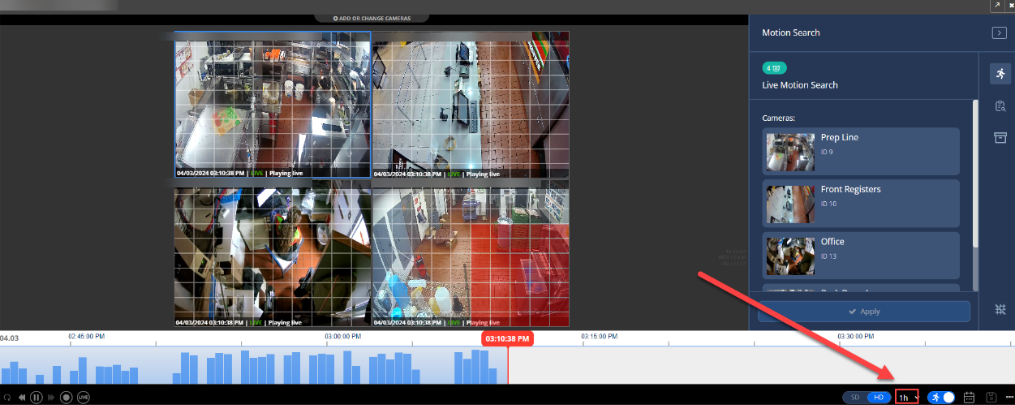
Your motion detection results are shown in the form of a histogram on the scrub bar. Move the scrub bar to play instances of motion occurring in your motion detection search results.
You can adjust the displayed video time range by clicking on the 1h icon.
My requests | All requests 
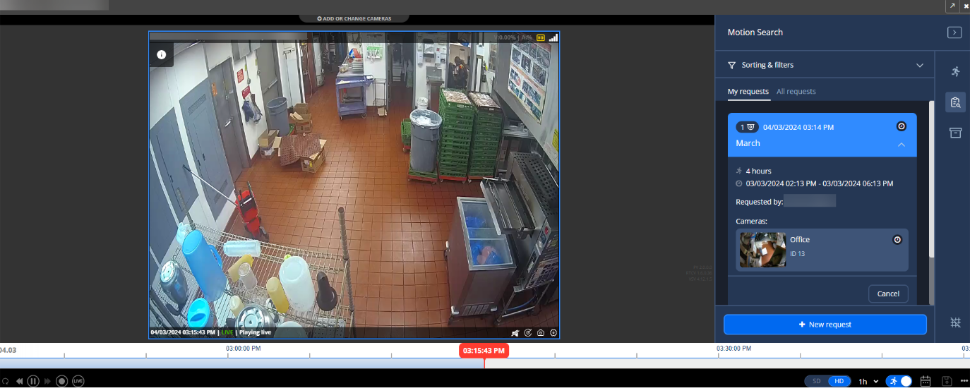
After clicking the My requests | All requests icon in the Motion Search side panel, you will see a list of motion requests that you created in the My requests tab and motion requests created by anyone in the All requests tab.
To see the details of a request, click on the request summary. The summary contains information about the date and time of the request, the duration of video, and the included cameras.
Using the cursor, choose the area(s) on the grid in which you would like to see motion detection events. Then, click the Apply button on the bottom of the Motion Search side panel.
Your motion detection results are shown in the form of a histogram on the scrub bar. Move the scrub bar to play instances of motion occurring in your motion detection search results.
You can adjust the displayed video time range by clicking on the 1h icon.
Motion Search on Demand
Note: 360iQ’s Motion Search on Demand feature works on all cameras NOT pre-enabled for Live Motion Search.
In this section, you can also create a new motion detection request.
To do this, click the + New request button on the bottom of the motion detection side panel. You will then see a selection wizard.
In the first step of the selection wizard, select the cameras on which you want to perform motion detection by clicking the Select button and choosing your preferred cameras. Then, click the Next button.


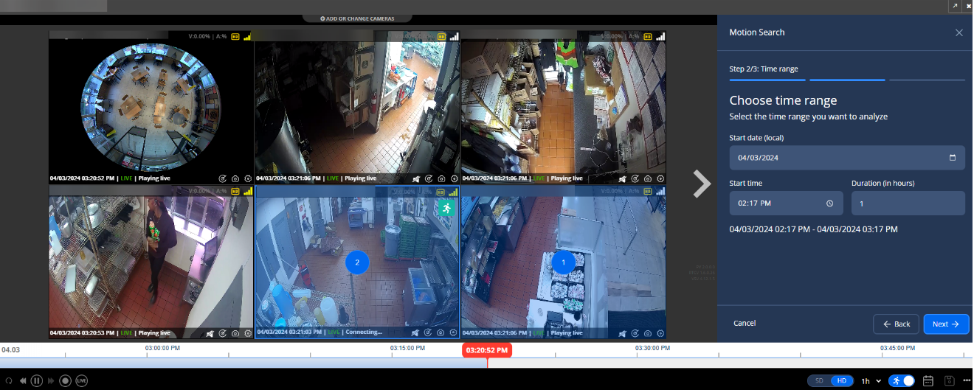
Select the date and time range in which you want the motion detection algorithm to run.
Note: The duration cannot exceed 8 hours and cannot include any time in the future.
After setting a valid date and duration, then click the Next button.
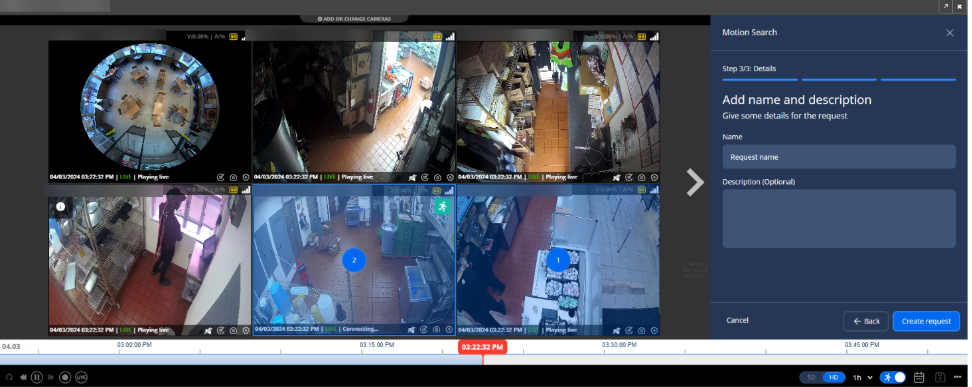
Additionally, you must name the request and optionally add a description for it. Then, click the Create request button to process the request. Your new request will be added to the request lists in the My requests and All requests tabs of the My requests | All requests section of the Motion Search panel. The status of your request will be updated on a regular basis and can be viewed at any time.